Formik form in an SPFx web part
I set a goal to do two things in the past two weeks. The first was to get to grips with React Hooks which was the topic of my previous post. The second was to build a custom form in an SPFx web part with React.
Co-incidentally, Chris O’Brien published a post last week about ‘tips for building a custom SPFx form’. I want to provide a working example of a custom form in a web part. I have published the code on GitHub here.
The thought probably comes to mind, ‘why don’t you use a list form, or a PowerApps form or a Microsoft Form?’. All valid questions. There are a some reasons at this point in time that I want to build a custom form. The first is that I want it to be available to guest users. PowerApps doesn’t currently support guest accounts. Microsoft Forms doesn’t have the depth of features that I want for this scenario. SharePoint list forms have some limitations for customisation.
So, I decided a custom form was the best path. As I researched and delved into building forms with React, it didn’t look like a very pleasant experience. So I started looking at libraries that supported building forms with React. The one I chose is Formik. It is a library that simplifies the creation of React forms and provides some nice features to get rid of lots of that boilerplate code. It also works very nicely with Yup for validation.
Andrew Mead has an excellent tutorial called ‘Better React Forms with Formik’ which was extremely helpful.
Lastly, I wanted to use Office UI Fabric React controls in my form. I found another library which really simplifies using UI Fabric with Formik called ‘formik-office-ui-fabric-react’.

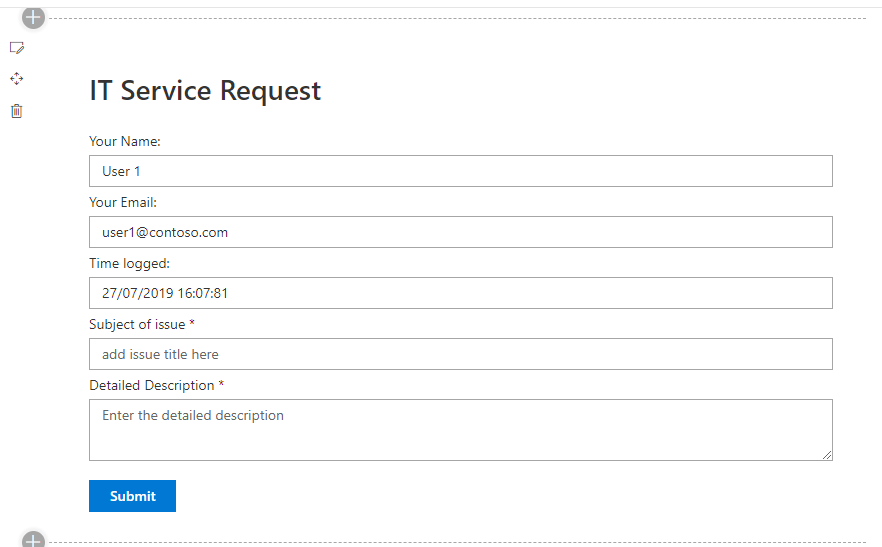
My example form in a web part using Formik
So with that combination of libraries, I think I ended up with an elegant and simple solution for building a form which looks really nice, is functional and includes validation. If you want to check out the code and how simple it ends up being, check out the source here.